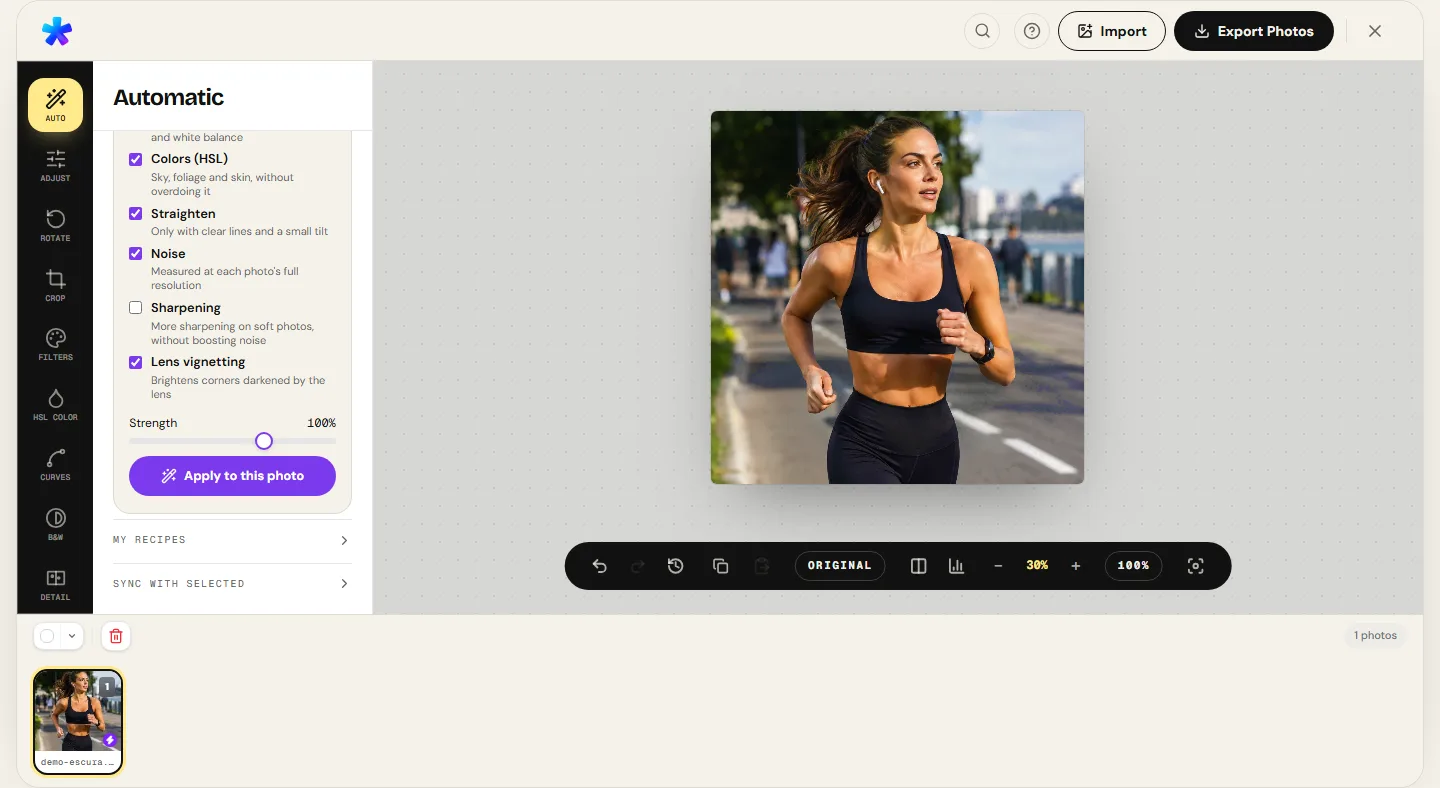
Correcting the lighting of a digital photograph is the absolute foundation of all image post-processing. No vibrant saturation, film emulation filter, or advanced sharpening routine can rescue an image whose tonal distribution is compromised by muddy underexposure or blown-out highlights.
However, the overwhelming majority of casual users treat exposure as a crude, one-dimensional slider: they blindly crank up global "brightness" to illuminate a shadowed face, which flattens midtones, washes out deep blacks into lifeless milky gray, and blows skies into stark white blanks. In optical science and professional photography, illumination divides into distinct tonal zones — exposure, shadows, highlights, whites, and blacks — governed by the physics of the 256-level histogram and the nonlinear response of human visual perception.
In this comprehensive guide, we explore 70% optical and photographic theory (sensitometry, EV stops, 256-level histogram dynamics, dynamic range compression, and Weber-Fechner perceptual contrast) and 30% private, client-side execution in PhotoEditor.sbs's Adjust panel, showing you how to recover hidden details, read real-time luminance graphs, and achieve tonal balance directly inside your web browser.
The physics of light: exposure vs. brightness vs. contrast
In everyday language, brightness, exposure, and contrast are often conflated as interchangeable terms. In computational image processing, however, they represent fundamentally distinct matrix operations:
- Exposure (Multiplicative Logarithmic Scaling): Simulates the physical lens aperture (f-stop) or shutter duration. It acts multiplicatively upon linear pixel intensity values. Elevating exposure by +1 stop (+1 EV — Exposure Value) is mathematically equivalent to doubling the photon volume striking the sensor, proportionally lifting the entire scene anchored around midtones. The formula governing exposure shifts is: Delta EV = log2(I1 / I0).
- Linear Brightness (Uniform Offset Shift): Adds or subtracts a fixed constant value uniformly across all pixels (\(Y' = Y + C\)). This mathematical operation is crude: adding a flat offset lifts deep blacks into chalky gray, while pushing bright highlights prematurely over the 255 clipping threshold. Professional editing suites replaced linear brightness with coordinated Exposure, Shadow, and Highlight controls.
- Perceptual Contrast (Pivot Slope Adjustment): Dictates the rate of intensity divergence between dark and bright regions. Mathematically, contrast rotates around a central fulcrum — universally standardized as 18% Middle Gray (RGB value ~128 in calibrated sRGB space under 2.2 gamma). Increasing contrast elevates values above 128 upward (brighter) while driving values below 128 downward (darker), injecting depth, snap, and visual punch.
Understanding this distinction is vital when working with digital raster files: linear sensor captures allocate half of all their available digital levels strictly to the brightest single f-stop (2,048 levels out of 4,096 in a standard 12-bit sensor), while the deepest shadow f-stop must survive on a meager 32 levels. Consequently, lifting underexposed shadows in post-processing demands smooth tonal math to prevent quantization banding.
The Weber-Fechner law and human contrast perception
To understand why naive linear brightness adjustments ruin photos, one must study visual psychophysics formalised by the Weber-Fechner Law: human sensory response does not scale linearly with physical radiant flux, but approximately logarithmically.
Human retinas evaluate contrast through relative percentage shifts rather than absolute photon counts:
- In a deep shadow emitting 2 candelas per square meter (cd/m²), adding merely 2 cd/m² doubles the apparent luminance (an unmistakable 100% perceived jump);
- Under blazing midday skies emitting 2,000 cd/m², adding the exact same 2 cd/m² constitutes a microscopic 0.1% change, completely invisible to the human visual cortex.
This physiological reality is why computer monitors and the sRGB standard mandate a 2.2 Gamma Correction Curve (~2.2). Without gamma expansion, digital captures would render unnaturally dim and crushed. PhotoEditor.sbs computes all tonal adjustments respecting this perceptual curve.
Ansel Adams' Zone System in digital raster imaging
During the 1930s, legendary photographers Ansel Adams and Fred Archer developed the renowned Zone System to calibrate exposure and darkroom negative development. The system translates the continuous gradient of light into eleven discrete roman-numeral zones from 0 to X:
| Ansel Adams Zone | 8-Bit Digital Histogram Match (RGB) | Visual Description & Representative Subject |
|---|---|---|
| Zone 0 | RGB 0 (Pure Left Wall) | Absolute maximum black. Zero detail or texture; total absence of light. |
| Zone I & II | RGB 1 to 40 (Deep Shadows) | Near black. First faint suggestions of physical form; deep black velvet fabric. |
| Zone III & IV | RGB 41 to 95 (Textured Shadows) | Rich shadow details: dark hair, shadowed forest foliage, dark clothing. |
| Zone V (The Benchmark) | RGB 118 to 135 (~18% Middle Gray) | Photographic neutral reference: dry asphalt, weathered stone, green grass. |
| Zone VI & VII | RGB 136 to 210 (Light Skin & Highlights) | Fair Caucasian skin under sunlight, light concrete walls, pale pastels. |
| Zone VIII & IX | RGB 211 to 254 (Textured Highlights) | Sunlit snow with ice crystals, billowy cloud masses, specular reflections on paint. |
| Zone X | RGB 255 (Pure Right Wall) | Absolute pure white burnout. Direct light sources, headlamps, and solar cores. |
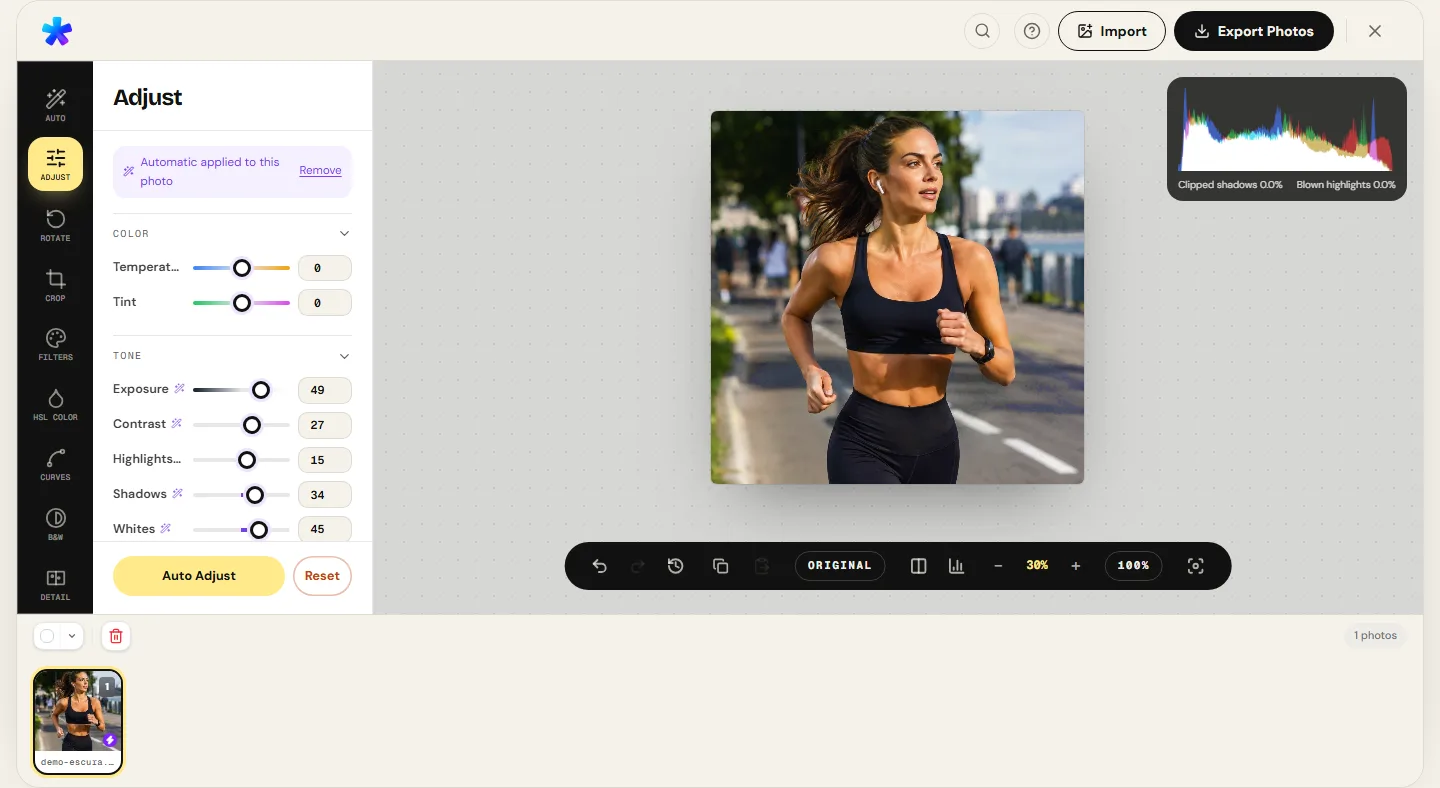
In PhotoEditor.sbs, the Blacks slider anchors Zones 0 and I; Shadows modulates Zones II through IV; Exposure re-centers middle Zone V; and Highlights preserves delicate textures across Zones VII through IX.
Histogram anatomy: decoding the 256 tonal intensity levels
The histogram is a photographer's most objective instrument. Human vision is easily deceived by ambient room lighting or laptop screen brightness. The histogram, however, provides an absolute statistical frequency plot mapping pixels across 256 discrete intensity columns (from 0 to 255 in standard 8-bit channels):
| Histogram Profile | Diagnostic Evaluation | Perceptual Impact | Corrective Action |
|---|---|---|---|
| Mass clumped against the left 0 boundary | Severe Underexposure (Unintentional Low-Key) | Dark, murky capture with critical details submerged in blackness. | Lift Exposure (+15 to +30) and elevate Shadows (+40). |
| Mass stacked against the right 255 boundary | Severe Overexposure (Unintentional High-Key) | Blown white skies, bleached skin tones, and severe loss of texture. | Reduce Exposure (−10 to −25) and pull down Highlights (−40 to −60). |
| Narrow central spike with empty margins | Tonal Flatness / Low Dynamic Range | Lifeless, milky, washed-out haze (typical of overcast daylight). | Boost Contrast (+20 to +35), elevate Whites (+15), and lower Blacks (−15). |
| Twin peaks at opposite boundaries with empty middle | Extreme Dynamic Range / Harsh Midday Sun | Inky black shadows and blinding highlight glare. | Compress dynamic range: raise Shadows (+35 to +50) and tame Highlights (−35 to −50). |
Dynamic range and navigating high-contrast lighting
The human eye is an astonishing biological optical instrument: through continuous pupil adaptation and multi-frame retinal integration, human vision perceives a dynamic range exceeding 20 f-stops in a single environment (comfortably resolving a sunlit outdoor window while discerning reading print in a shadowed room).
State-of-the-art camera sensors capture between 12 and 14 stops in RAW formats, while standard consumer sRGB displays render roughly 8 to 9 f-stops. Printed matte paper compresses dynamic range even further, often topping out at barely 5 to 6 stops (a 100:1 contrast ratio).
When capturing backlit subjects (such as portraiture against a sunset or an interior room with bright window glass), the scene's dynamic range overwhelms display capabilities. Post-processing requires proportional dynamic range compression: lifting shadow exposure where faces are silhouetted, while pulling down highlight intensity to preserve delicate sunset hues.
This tone mapping process is not a blunt flattening of the scene. The goal is to retain micro-contrast within each zone while compressing the global distance between the absolute brightest specular point and the darkest ambient corner. Without intelligent zonal compression, high-contrast scenes force photographers into a painful compromise: either blow the sky to save the foreground subject, or turn the subject into an unidentifiable black silhouette to preserve cloud colors.
The four zonal controls: shadows, highlights, blacks, and whites
PhotoEditor.sbs avoids blunt brightness sliders in favor of four zonal controls offering surgical precision:
| Control Slider | Primary Target Zone | Practical Visual Effect | Retouching Caution |
|---|---|---|---|
| Shadows | Dark tones (RGB 16 to 80) | Illuminates dark clothing and foliage without washing out true blacks or blowing skies. | Pushing above +60 can reveal hidden sensor noise and dark current grain. |
| Highlights | Bright tones (RGB 180 to 245) | Recovers cloud textures, wedding dress lace, and metallic specular sheen. | Cannot restore detail already blown to raw 255 white in the original capture. |
| Blacks | Baseline anchor (RGB 0 to 30) | Establishes where true deep black anchors on the zero boundary. | Lifting produces faded vintage matte tones; lowering crushes shadows into silhouette. |
| Whites | Ceiling anchor (RGB 220 to 255) | Stretches highlights outward to produce crisp, vibrant visual clarity. | Ensure the histogram tail does not pile up on the 255 right wall. |
Global contrast vs. midtone clarity micro-contrast
Photographs often appear slightly hazy or flat even after basic exposure and contrast adjustments. This is where Clarity becomes indispensable.
While global Contrast operates across the entire tonal span (widening the separation between deep blacks and bright whites), Clarity is a specialized band-pass micro-contrast algorithm acting exclusively on midtone edge frequencies:
- It isolates medium-frequency spatial edges (such as brick mortar, clothing fibers, cloud ripples, and wood grain) and amplifies local border contrast;
- It leaves extreme shadow and highlight anchors untouched, preventing dynamic range clipping;
- Portrait Warning: Excessive Clarity exaggerates wrinkles, enlarged pores, and blemishes. In portraiture, a slight negative Clarity setting (−5 to −15) yields flattering, organic skin smoothing.
Step-by-step PhotoEditor.sbs workflow: reading to calibration
Follow this methodical sequence adopted by master colorists:
- Correct White Balance First: Unwanted color casts skew tonal perception. In the Adjust panel, adjust Temperature and Tint until neutral whites or grays appear pure.
- Open the Real-Time Histogram: Tap the bar chart icon to inspect clipping percentages.
- Set Global Exposure: Move the Exposure slider to place the primary subject mass into the midtone region (prioritizing human skin over backgrounds).
- Recover Highlights and Open Shadows: Pull Highlights leftward (−20 to −50) to tame skies. Slide Shadows rightward (+20 to +45) to illuminate faces and dark foregrounds.
- Anchor Blacks and Whites: Watch the histogram. Adjust Blacks until the left tail nears the 0 boundary without clipping over 0.5%. Slide Whites rightward until highlights sparkle without clipping.
- Dial in Contrast and Clarity: Add snap with Contrast (+10 to +20). Add punch to landscapes with Clarity (+10), while keeping portraits neutral or softly muted.
- Finish with Vibrance: Avoid blunt global Saturation. Use Vibrance (+10 to +18) to boost muted pigments while safeguarding skin tones.
Recommended parameters for challenging photographic scenarios
Treat these configurations as dynamic starting points rather than rigid dogmatic formulas:
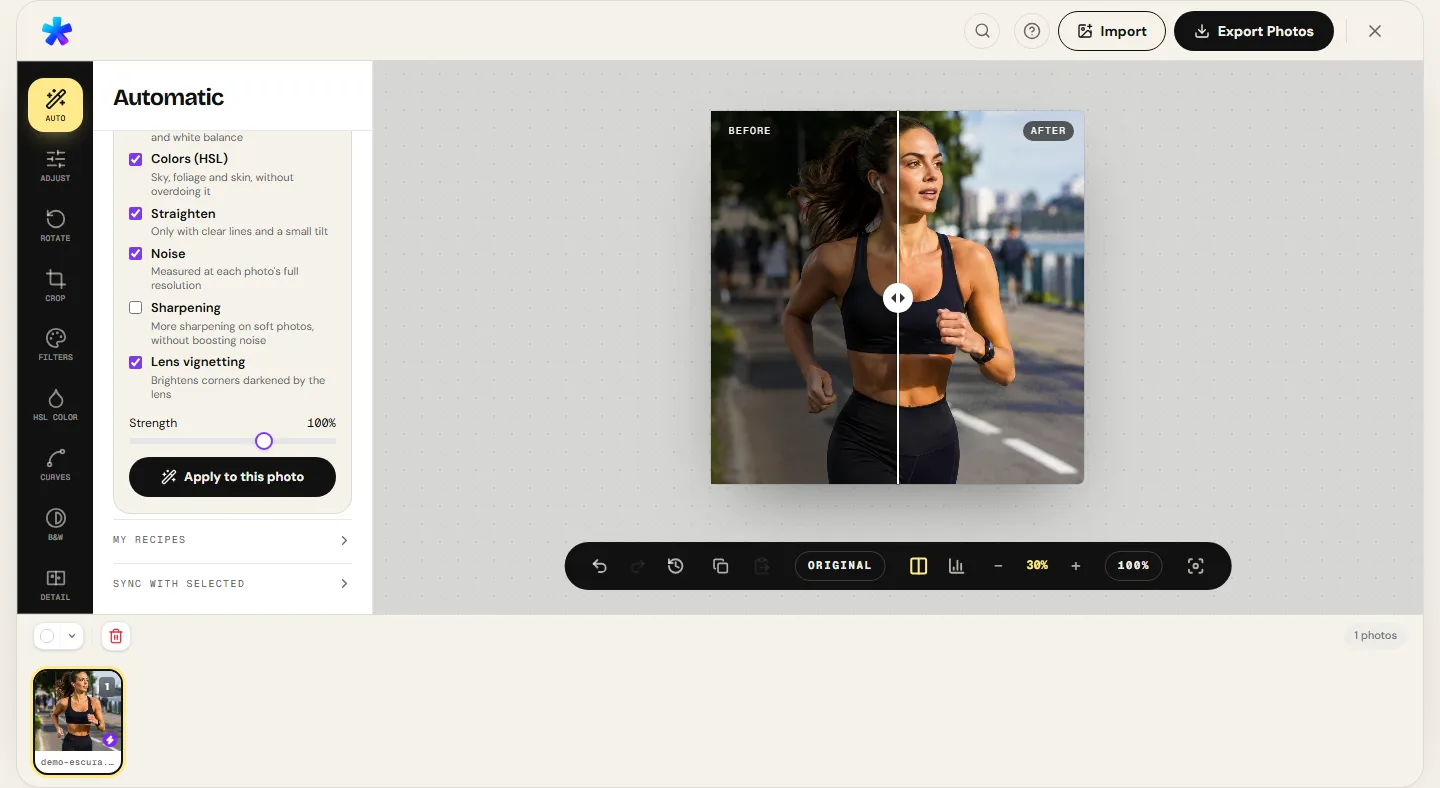
- Backlit Golden-Hour Portraits: The primary trap is allowing the amber evening glow to blow into flat white while the subject's face remains trapped in silhouette. Pulling Highlights downward to −35 instantly restores the warm sunset gradient, while lifting Shadows to +45 illuminates facial features without muddying the hair.
- Overcast and Rainy Daylight: Thick cloud cover acts as a massive optical softbox, scattering light and destroying directional shadows. The resulting histogram resembles a narrow central bell curve. Elevating Contrast to +25 while simultaneously expanding Whites (+20) and dragging Blacks down (−15) artificially widens the tonal footprint, breathing three-dimensional depth into an otherwise flat scene.
- E-Commerce Catalog Photography: Online marketplaces mandate pure, sparkling white product backgrounds (RGB 255, 255, 255). By nudging Whites up to +35 and dropping Blacks to −20, the background canvas bleaches to pristine studio white while product edges maintain crisp separation.
- Warm Indoor Ambient Light: Domestic tungsten and halogen incandescent bulbs cast a severe 2700K orange-yellow veil. Bringing Temperature down to −25 neutralizes the cast, while lifting Shadows to +30 reveals interior room architectural textures.
- Sunset Mountain and Ocean Vistas: The massive exposure gulf between blazing solar disks and shadowed foreground topography demands aggressive highlight containment. Setting Highlights to −50 and Shadows to +25 balances the scene without flattening organic horizon transitions.
| Lighting Scenario | Recommended Parameters | Visual Goal | Critical Watchpoint |
|---|---|---|---|
| Backlit Portrait in Golden Hour | Exposure: +10 | Shadows: +45 | Highlights: −35 | Blacks: −10 | Illuminates facial expressions without bleaching golden background skies. | Keep shadows under +60 to prevent sensor noise from surfacing. |
| Dull Overcast Day | Contrast: +25 | Whites: +20 | Blacks: −15 | Vibrance: +18 | Cuts through gray haze, establishing crisp foreground-background separation. | Do not raise Saturation globally to avoid turning skies purple. |
| E-Commerce Product on White Backdrop | Exposure: +15 | Whites: +35 | Highlights: −10 | Blacks: −20 | Forces backdrops to sparkling white while preserving merchandise edges. | Ensure bright product surfaces do not clip. |
| Dim Indoor Tungsten Lighting | Temperature: −25 | Shadows: +30 | Exposure: +15 | Clarity: +8 | Cools down yellow casts and clarifies dark room corners. | Balance tint carefully to prevent skin tones from looking greenish. |
| High-Contrast Sunset Landscape | Highlights: −50 | Shadows: +25 | Contrast: +15 | Vibrance: +20 | Preserves deep sunset saturation while recovering foreground topography. | Maintain solar brilliance without flattening horizon transitions. |
How automatic tonal analysis works and when to deploy it
In PhotoEditor.sbs, the Auto Adjust button performs a deterministic statistical analysis over the photo's raster matrix:
- Photometric Luminance Conversion: The engine maps each pixel into perceived optical luminance using the standard ITU-R BT.709 coefficients: \(Y = 0.2126R + 0.7152G + 0.0722B\). This accurately reflects human eye sensitivity, which is heavily weighted toward green wavelengths.
- Median and Quartile Calculation: It computes the true median luminance across an ephemeral working downsample buffer to evaluate global exposure bias without choking CPU cycles.
- Percentile Boundary Mapping: It isolates the 1st percentile (\(P_1\)) and 99th percentile (\(P_99\)) intensity points to anchor the Black and White boundaries, ensuring contrast stretches maximally across the available 8-bit dynamic range.
- Dynamic Highlight Safety Gate: A built-in mathematical governor continuously monitors clipping: if automatic highlight lifting causes the percentage of blown 255 pixels to rise by more than 0.5%, the algorithm instantly rolls back Highlights and Whites to preserve delicate specular detail.
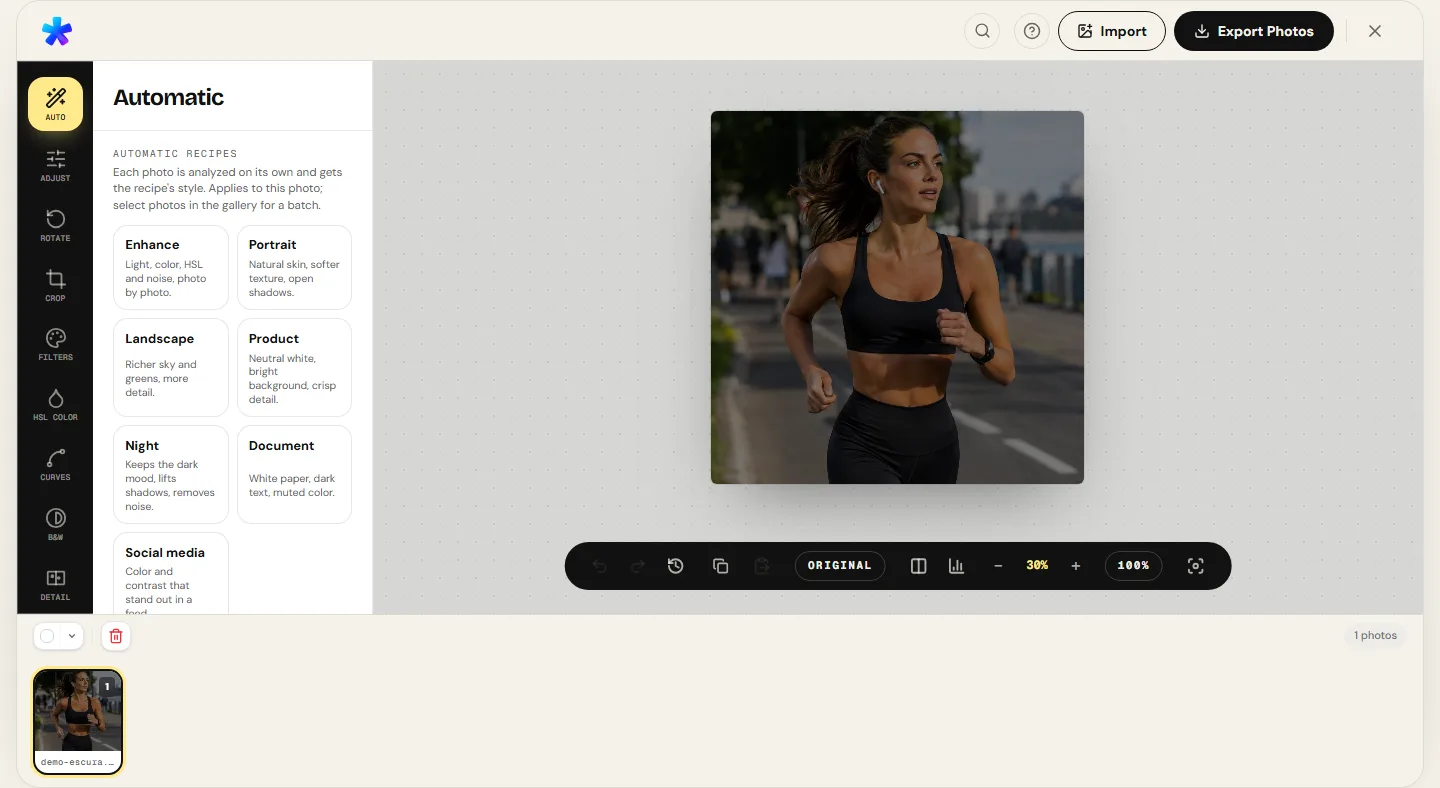
- Specialized Recipe Targets: Beyond the universal Auto button, the Auto panel houses seven tailored profiles: Enhance (balanced general correction), Portrait (gentle skin smoothing with open midtones), Landscape (assertive contrast and deep sky preservation), Product (pure white background isolation), Night (shadow recovery with subdued highlights), Document (high-contrast black text on crisp paper), and Social Media (punchy vibrance and midtone clarity calibrated for mobile OLED viewports).
When to transition from sliders to interactive tone curves
The Adjust panel effortlessly handles 90% of routine lighting edits. However, when you demand surgical micro-control over a narrow tonal slice — such as designing lifted matte blacks (*film look*) or flattening midtone contrast independently —, explore our dedicated Curves tool.
The Curves panel allows you to manipulate up to 10 independent anchor points across the tonal map, providing complete artistic mastery.
Frequently asked questions
Is there a slider called 'Brightness' in PhotoEditor.sbs?
No. We replaced crude linear brightness with coordinated Exposure, Shadows, and Highlights. Old-school brightness simply added a flat numerical value to all pixels, destroying blacks and blowing highlights uncontrollably.
What does the yellow percentage indicate on the editor's histogram?
It warns that more than 1% of the image's pixels have clipped: either crushed into pure black (0, 0, 0) on the left or blown into flat white (255, 255, 255) on the right. Adjust Blacks and Whites to bring this under 0.5%.
Why does my photo look flat and grayish after lifting shadows?
Lifting Shadows excessively (above +50) pulls dark values toward midtone luminance, narrowing the tonal gap between light and dark. To restore punch, slightly elevate Contrast or drag the Blacks slider downward.
Can I brighten a nighttime photo without introducing grain?
Low-light captures inevitably hold sensor noise within dark shadows. Raising exposure or opening shadows reveals that noise. To counter this, head to the Detail panel immediately after lighting adjustments to apply Color and Luminosity noise reduction.
What is the core difference between Contrast and Clarity?
Contrast affects the entire tonal range, pushing darks and lights apart around middle gray. Clarity is a localized micro-contrast filter that amplifies edge transitions strictly within midtones, leaving pure blacks and whites intact.
Can I copy lighting adjustments across multiple photos from the same shoot?
Yes. Once you dial in the ideal settings in the Adjust panel, press Ctrl+C to copy the recipe and press Ctrl+V to paste settings across subsequent images in your gallery queue.
How do I fix a blown white sky without darkening the subject's face?
Leave global Exposure untouched. Instead, reduce the Highlights slider to the left (−30 to −60) and slightly ease Whites downward. The sky will recover cloud textures while skin exposure remains protected.
Does adjusting lighting modify or degrade the original file on my machine?
Not at all. PhotoEditor.sbs executes all operations on an ephemeral canvas matrix in browser RAM. Your original master file on disk remains completely untouched.