( Free · in the browser · no sign-up )
Remove noise from photos online.
Luminance. Color. Masked sharpening. High-ISO shots. Night photos. Checked at 100%.
Concert, party or night phone photo full of grain and colored specks? Smooth luminance noise and color noise separately, give the edges their definition back and check at 100%.
You can also drag and drop one or multiple images in this area.•Accepted inputs: JPEG, PNG, WEBP, AVIF, HEIC, TIFF, GIF and BMP (HEIC and TIFF are converted on import). Export as JPEG, PNG and AVIF, and as WEBP when the browser supports that encoding.
Image editing runs in the browser. The site can still make technical requests and, subject to your consent, load measurement or advertising. Read the Privacy Policy.


- 01No installation
- 02In-browser editing
- 03Preview before export
- 04No sign-up
( How it works )
How to clean noise without erasing the photo
- ( 01 / 03 )
1. See the noise at real size
Open the photo and click 100% in the bottom bar. In a reduced view the noise disappears and any value looks fine; at real size you can tell grain from detail.

- ( 02 / 03 )
2. Color first, luminosity second
In the Detail panel, raise Color until the colored blotches in the shadows are gone. Then raise Luminosity slowly, stopping while skin and walls still have some texture.

- ( 03 / 03 )
3. Restore definition and compare
If edges went soft, use Sharpening with a high Masking value so it only acts on edges. Check with the before/after divider, then export.
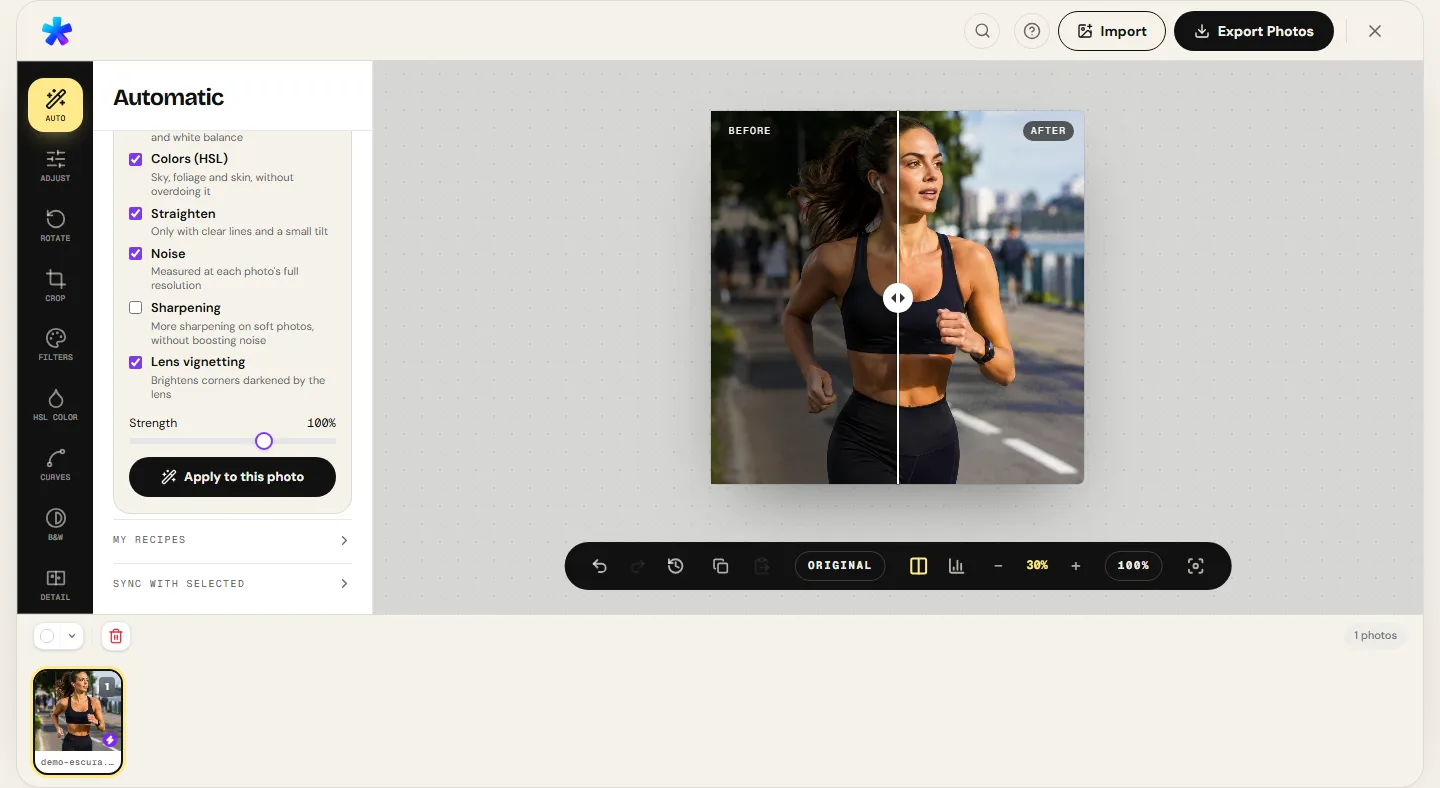
( The interface )
Current tool interface
( What it does )
What the Detail panel does
- 01
Two kinds of noise, two controls
Luminosity smooths brightness grain with a guided filter, which flattens smooth areas and respects edges. Color blurs only the color information, removing blotches without blurring outlines.
- 02
Sharpening with an edge mask
Amount (0 to 150), Radius (0.5 to 3 px) and Masking (0 to 100). With masking high, sky, skin and background are left out and only edges gain contrast.
- 03
Automatic, measured at full resolution
Auto sharpening and noise estimates the photo's noise at real size and measures edge sharpness before proposing values. With photos selected in the gallery, it analyzes them one by one.
( What people use it for )
Photos that usually need it
- ( 01 )
Concerts and clubs
High ISO and colored light create color blotches in dark areas. The Color control fixes most of it without touching faces.
- ( 02 )
Phone photos at night
The phone's own processing already smooths a lot. A low Color value and light masked sharpening are usually enough.
- ( 03 )
Underexposed, then brightened
Lifting shadows enlarges noise that was hidden. Treat noise after the light adjustment, looking at the shadows at 100%.
- ( 04 )
Images for print
Grain shows more on paper than on a phone screen. A light pass before exporting at full size is worth it.
( Questions? Answered )
Frequently asked questions
What is the difference between luminance and color noise?
Luminance noise is pixel-to-pixel variation in brightness, similar to film grain. Color noise is red, green and blue specks, most visible in shadows. That is why the panel has one control for each.
Why did the photo get blurry?
Noise reduction and sharpening pull in opposite directions. With high Luminosity, fine textures disappear with the noise. Lower the value or add back some sharpening with high masking.
Is the automatic result always right?
It starts from a real measurement of the photo, but how much grain to accept is your call. Use it as a starting point and check at 100%.
Does the tool use artificial intelligence?
No. These are image filters computed in the browser. They reduce variation; they do not rebuild detail.
Can I treat several photos at once?
Yes. Select photos in the gallery and run the automatic option, which analyzes each one separately, or copy and paste the settings of one photo onto the others.
( In depth )
Where noise comes from and why it never fully goes away
Noise is the part of the image the sensor recorded that was not light from the scene. Knowing where it comes from explains why every reduction trades a little detail for cleanliness.
Photons counted, not measured
Each sensor pixel counts how many photons arrived during the exposure. Their arrival is random: two identical shots of the same grey wall do not receive exactly the same number of photons in each pixel. In strong light the difference is small compared with the total. In low light the total is small and the variation becomes a large share of the signal. This is shot noise, and no sensor escapes it.
Raising ISO does not create that noise: it amplifies the weak signal along with the variation already there and the circuit's own electronic noise. That is why a well-exposed ISO 6400 photo often has less noise than an underexposed ISO 400 photo brightened afterwards. What matters is how much light reached the sensor.
Brightness and color are different problems
Human vision is far more sensitive to variations in brightness than in color. Editors exploit this: color can be smoothed with a wide radius, because losing some color definition is barely noticed, while brightness needs careful treatment, because that is where edges, hair and skin texture live.
That is why the panel separates Color and Luminosity. Colored blotches are usually the ugliest defect in a night photo and the easiest to remove. Brightness grain bothers less and costs more to take out.
Smoothing without erasing edges
A plain average of neighbors removes noise and also removes edges, because it cannot tell them apart. Edge-respecting filters, like the guided filter used here, measure local variation: where it is small and scattered they treat it as noise and smooth it; where there is a strong, organized transition they keep it.
No filter of this kind perfectly separates fine texture from noise. Distant leaves, fabric and pores have the same scale as the grain and fade together as the value rises. The right point is where the noise stops drawing attention, not where it vanishes.
The right order: clean, correct, sharpen
Sharpening increases contrast at transitions, and noise is made of small transitions. Sharpening before cleaning enhances the grain and then demands a stronger reduction. The editor applies noise reduction first, then light and color, and sharpening near the end, followed only by vignette and grain.
Sharpening masking completes the idea: when it is high, sharpening is limited to strong edges and does not bring the noise back in the smooth areas that were just cleaned.
( Keep going )
Continue with the right workflow
- ( 01 )Noise reduction guideA step-by-step with starting values for each kind of photo.Read
- ( 02 )Add grainThe opposite path: deliberate texture, applied after sharpening.Read
- ( 03 )Adjust light and colorGet exposure and shadows right before judging noise.Read
- ( 04 )Editor helpWhat to do when the preview is slow or memory runs short.Read
( Ready when you are )
Clean noise at real size
Open the photo, click 100% and raise one control at a time until the grain stops drawing attention.